In this article we are going to look at how to operate, clean & service the mechanism of the Thelford Cassette toilet – Everything you need to know is here in one place, so that you will get the best use or your toilet for many years.
There are different models of the Thelford Cassette, but they basically all operate in the same way.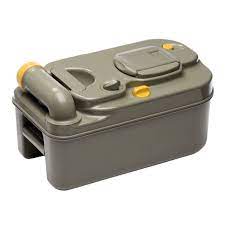
Thelford C220 series – C260 series – C400 series
The examples that we are going to look at today are the Thelford 220/260 series
The Basics Of Use & Operation
It as a handle underneath the bowl which just pushes from side to side. With the seat up, inside you can see the blade which is the top of the actual cassette.
This is not part of the internal of the toilet, it’s part of the external tank underneath, which is the called the cassette. Moving the handle from side to side opens that blade and get’s you access into the innards of the cassette, which is where all the good stuff goes.
When you flush the toilet, you open that blade up, and then you do what you need to do and you flush it. And then you close the blade and the remaining flush water dribbles down the inside of the bowl and it will sit on top of the blade. There’s a rubber seal around the top of it.
Usually the water for the toilet flush, comes from the onboard water tank. As this is also for your personal use, when filling the tank, always use a food grade hose. This article explains why – Motorhome water hose
Removing The Cassette
We’ll take the cassette out now from the outside of the van and you’ll see what it looks like and we’ll have a closer look at the component parts. 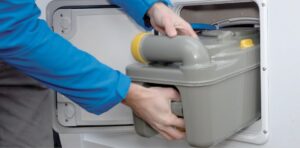
It’s important that inside the blade is closed.
Why? It always needs to be closed because without being closed, it won’t come out because the mechanism won’t allow the cassette to be removed.
What’s Inside ?
These are the working parts of the talk cassette, on the outside. Not visible here is the blade mechanism, but we’ll get to that.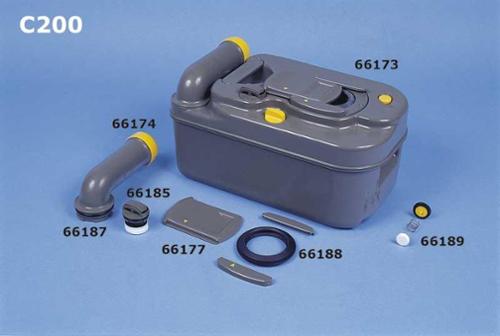
We’ll have a look at the blade, the sliding cover and the functions of the toilet and then you can take it apart and see what’s inside it and what sort of things would be in your best interests to go over, at a certain time period & pull apart.
This is the pour out spout here, which turns around & then you can take the cap off.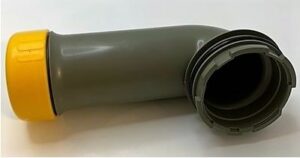
There’s measuring indicators in the cap, so you can use it as a measuring cup & put in, however much toilet chemical or whatever you use in the cassette.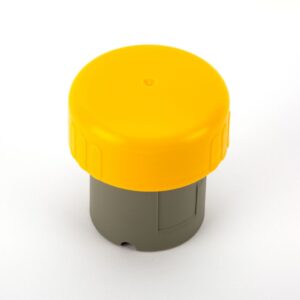
There is a sliding cover on top of the seal. It slides open & closed when you put the toilet in and out of the cassette locker and exposes that seal and the blade. When you take the cassette out of the locker the seal covered up by this.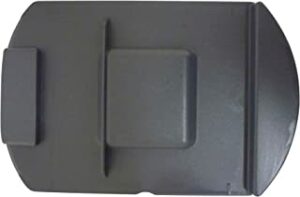
I’m not a hundred percent sure why they do that other than to hide something that some people might find offensive.
I don’t know it doesn’t perform any practical purpose other than covering up the seal.
Useful Tip
The small yellow lever on the top of the tank is operated by the lever inside the cassette when it is inserted back into the locker. It turns to the side and opens the blade up and lifts it up when it closes. It lifts up to seal the blade against the rubber.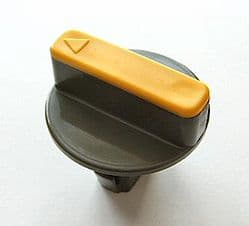
There’s always a little water sitting in there, so what I do when I’m going to remove the cassette, is to bring the cassette forward in its locker, then open & then close this yellow lever to let this water drain into the tank and then we’re ready to completely remove it.
This way when you lift it down you don’t get this water running out over your hands.
The round button on the tank top is the air release, so you hold that button down when emptying the cassette. It allows air to rush in as the liquid and so forth is coming out of your pour spout.
If you don’t push that button, you’ll get like emptying a bottle of coke, it will glug out and then that’s when you get splashed back, and none of us want that.
So make sure that you push that button and then simply tilt and out it will come in one continuous flow and then you’re done.
Now we want to rinse it out. So tip it up so that the pour spout is facing up & use a hose to partly fill the cassette & rinse it around, give it a light shake & empty it out.
You can do this a couple of times, if you wish, until the water runs clean
and we’re ready to put it back into the external locker, once we have added the toilet chemical.
Cleaning & Servicing
The pour spout, if you turn it all the way around, it will actually come out and can be cleaned & checked
There’s a rubber o-ring on the bottom, which you can oil and then that can be put back on.
I use olive oil just the same stuff that you used to cook with, but you can use silicon, grease or similar.
Personally I only use olive oil.
On the section with the cover flap, there’s an arrow on the central round bit and there’s two circles: one open circle, one close circle to indicate that it’s locked, so the arrow is lining up with its closed one indicating that’s locked off straight. So this is where it is supposed to be, when locked.
It Can Be Stiff
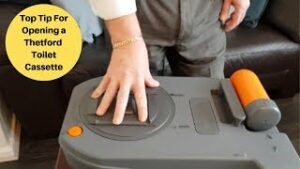
If we turn that around to the unlocked position, it can then be removed. It might be a bit stiff because it’s got an o-ring in there & if it hasn’t been lubricated, it will be a little bit stiff. Turn that arrow to the circle and it will just lift out, and that is the entire blade mechanism.
That’s how it works, pull the cover off and all it does is turn the lever.
It turns the blade around and then lifts it up, pushes it against that seal and it creates a seal. So it stops some of the smells coming out inside the van.
This can then be cleaned & disinfected, ready to use.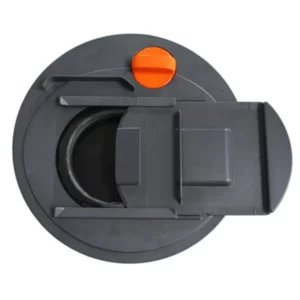
Give it a wash out inside make sure that it’s clean, put some disinfected in there shake it around. If you can, get in there with a little brush like an old sink brush before you’re, throwing it out is not a bad idea, and then we lubricate the seal and in between at the moment.
You want to be washing your hands, when you’ve done this of course.
Oiling The Seals
So what I do is to get a rubber glove that we leave in the toilet area anyway, pour a bit of olive oil onto that glove and just run it around the seals and then same with the pour spout and then that’s nicely lubricated so it’s going to protect the rubber seals and give more longevity out of your toilet.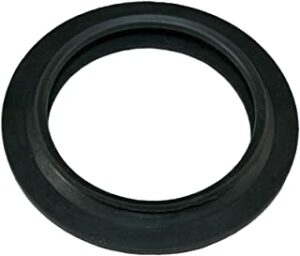
Refitting the blade assembly
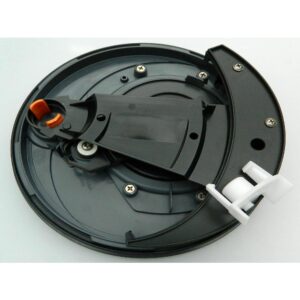
This is just the reversal of how we took it off. So just clip it back in again where the open circle is – and it just spins around winding it up to close, put the sliding cover back on and it’s ready to go back in to the locker.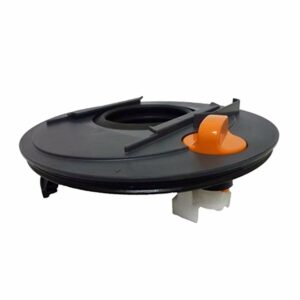
It’s cleaned, it’s lubricated and it’s ready to go.
Make sure that the yellow lever is in line with the toilet, because that means that the blade is closed.
If it’s lined up the other way, with the blade open, it will not line up with the mechanism inside that the area where the cassette slides in because it has to marry up with the mechanism.
Slide it back into the locker & that’s it all done, cleaned lubricated & properly looked after. It will last you a very long time.
All the spares – Click here
If you see anything that is broken or worn, then most parts are available.
Tip for a Sweet Smelling Cassette Locker
One thing before we put the cassette back in, right at the end of the cavity inside where the cassette lives I put in a commercial toilet, biscuit. They’re the things that for blokes They’ll know well it because you see them in every urinal. For the ladies, it sits in the bottom of urinals in commercial premises, hotels and things like that, and it puts off a perfume scent.
So we’ve got a commercial toilet, biscuit with the plastic trim cut off it. It’s new, it hasn’t come out of a pub urinal and we shoved it up the end of the locker, and it just smells nice in that cavity all the time.
The Thelford Toilet Cassette Explained.
Thanks for reading. I really hope this article has helped you in understanding the different parts to the toilet & gives you the confidence to get your hands dirty, not literally I hope, & services your own cassette.
These simple tips will keep your toilet flushing beautifully for many years to come.
Cheers, Duncan.
