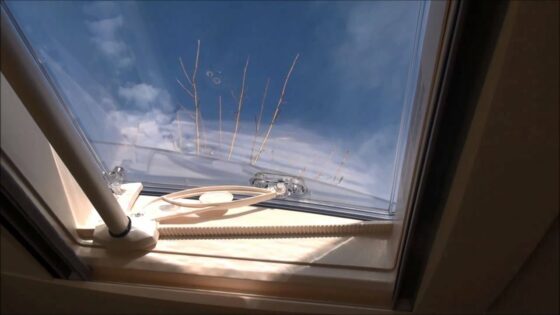
Rooflight vents in motorhomes & caravans are brilliant pieces of kit, they come in all shapes & sizes, with different opening mechanisms & features allowing additional light in, open up for ventilation & keep the rain out. But when your relaxing infront of the tele & suddenly hear ” rooflight vent leaking- What do I do ?” At this point, it’s a good idea to have some plans on how to fix it.
Have a Look – It could be something obvious.
If the hatch has been open, is it shut fully? See if some debris, twig etc is stopping it from fully closing. – Remove debris & fully shut the hatch.
If the hatch appears to be fully shut, does it lift up if you push it? Is the locking mechanism holding it down firmly. Can you see anything wrong that can easily be fixed? – If not, the easiest quick fix might be to tape the hatch down.
Has something damaged the hatch. Can you see a crack or split in the clear plastic ? – Again, for a quick fix taping over the crack would stop the leak or place a plastic bag over the open hatch, lower the hatch, pull the excess plastic in to make the top tight & fully lock down the hatch.
What if it all Looks Good ?
Unless cracked or broken, it will be the seal on the roof.
I have resealed all 3 of the hatches on my motorhome, doing quick repairs to get me out of trouble & then fully resealing them.
For a quick temporary fix –
Once the rain has stopped, get up to it, make sure it is really clean & dry & whack on some duck tape or similar all the way round, the hatch where it joins the roof.
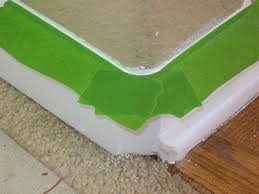
Start from the BACK/Rear face of the rooflight frame.
Use a single strip along the back/rear straight side of the hatch, covering the hatch & roof joint. Place the tape on the rooflight vent frame & press firmly along the hatch edge & roof join, smoothing the tape onto the roof with no creases.
Now cut small (5cm) lengths of tape, starting from the back tape edge, place the small pieces over the frame/roof join around the curves finishing on the straight edge, overlapping each other on the left & right hand side of the rooflight.
Then continue as above with a single strip along the left & right sides of the hatch. Repeat the process with the small lengths around the front two corners, finishing on the front straight.
Finally, apply a single strip along the front facing straight edge, over lapping the tape on the two corners.
The reason that you start from the back & overlap all the pieces going forward on both sides is simple.
You have made a sealed edge, so that when motoring forward at speed, the repair has no edge facing into the 50mph wind, that is created.
If taped front to back & the wind gets under 1 edge it will rip the whole lot off!
When you get the time to do it properly –

Rooflight vents come in all different sizes, most have mosquito nets, black out screens built in & some have fans.
They all though are of the same basic fixing design & that is, a top frame with the opening window in it that is on the roof covering the cut out & the bottom frame that covers the fixings of the top & makes it look complete.
The blinds etc can be in either depending on the rooflight.
So Here We Go –
From the inside take off any plastic trim that covers the fixing screws – remove all screws & carefully take off the inside hatch.
Check the ceiling to see if there are any more screws & fixings that need to be removed.
With the rooflight open stand up into it (if you can, to avoid having to go onto the roof) & using a flat blade carefully cut the sealant between the hatch & the roof – A good idea here is to work from 1 corner & then cut along each straight edge.
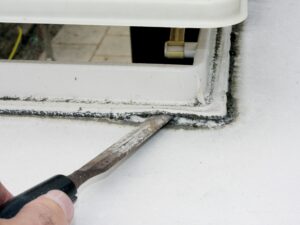
Do Not Force The Rooflight
Carefully lift the hatch at the corner & slide in a wedge eg, flat bladed screwdriver, chisel or similar. Keep working away from this corner, lifting the hatch as you go along.
Take your time to see where the sealant is still holding & when all of the seal has all been cut, you can simply, but carefully lift of the rooflight. If you close the rooflight & hold it vertically it will fit through the roof cut out at the diagonal.
This makes it much easier to inspect it & clean off all of the remaining sealant. Make sure that all of the sealant is removed & that the base or the rooflight is really clean & dry.
Check the Frame Thoroughly
Take your time & carefully check the frame, if it is cracked or chipped, it will not seal properly on the roof & so unless you see that you can make a suitably water tight repair, it is probably wiser to replace the hatch. Personally I wouldn’t do all of this work if I had any doubts on the rooflight still leaking.
I would measure the rooflight carefully & get a replacement
There is a wide choice online & you will be able to get exactly what you need by clicking on either of these platforms.
Back up looking on the roof, normally now you will see some stain or dirt where the water has come across the seal on the roof.
Quite often it will only be a small break in the seal & could very well be on the opposite side of the rooflight to where you thought the leak was coming from.
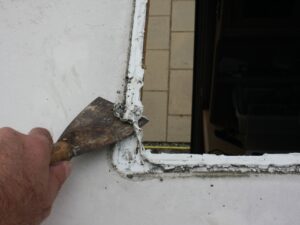
Remove all of the sealant on the roof & thoroughly clean the area. There are various solvents that will help to remove the old sealant. WD-40, vinegar or alcohol, wait for it to soften and then attack it with a knife or paint scraper. Acetone (my prefered choice) does a fantastic job at dissolving the silicone, making the job pretty quick and easy when compared to other methods.
But it is very strong & can damage paintwork, so use it with care. Use it on a local area.
DO NOT slop it all over the place.
DO NOT leave an Acetone soaked rag on a surface.
DO NOT get it onto clear perspex, as it melts it.
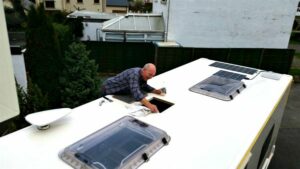
You can still see the markings as to where the roof light sits & the original seal, which makes life easier when refitting it – apply a continuous bead of sealant (sikaflex 512/ 522 caravan sealant, being very good) all around the underside of the rooflight where the original seal was.
How Much Sealant ?

Normally the sealant goes in the centre of the frame so you want to add a thick bead, that will ooze out of it’s channel when refitted, but will stay within the frame edges & not look messy.
Now put the outer rooflight section back on the roof over the cuy out & try not to move it around too much – refit any fixings into the ceiling if there were any.
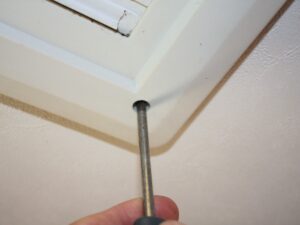
Get the inside part of the hatch & offer it up to the roof – most locate really easily & you can usually see
exactly where it goes, due to the screw holes & marking on the ceiling.
Refit all of the securing screws, tightening each corner & then the middle ones, to get the hatch to pull down evenly onto the new sealant.
Finally, refit the plastic trim covers.
Job done – Go & get a well earnt beer or similar,
